How to Create and Schedule a Campaign
Last updated on May 15, 2026
A campaign in Mailzzy takes you through a clear step-by-step process — from naming your send to designing your email and choosing when it goes out. This guide covers every step of the campaign creation workflow.
Step 1: Start a New Campaign
- Click Create Campaign from Dashboard or Campaigns page in Mailzzy.
- Select Regular Campaign.
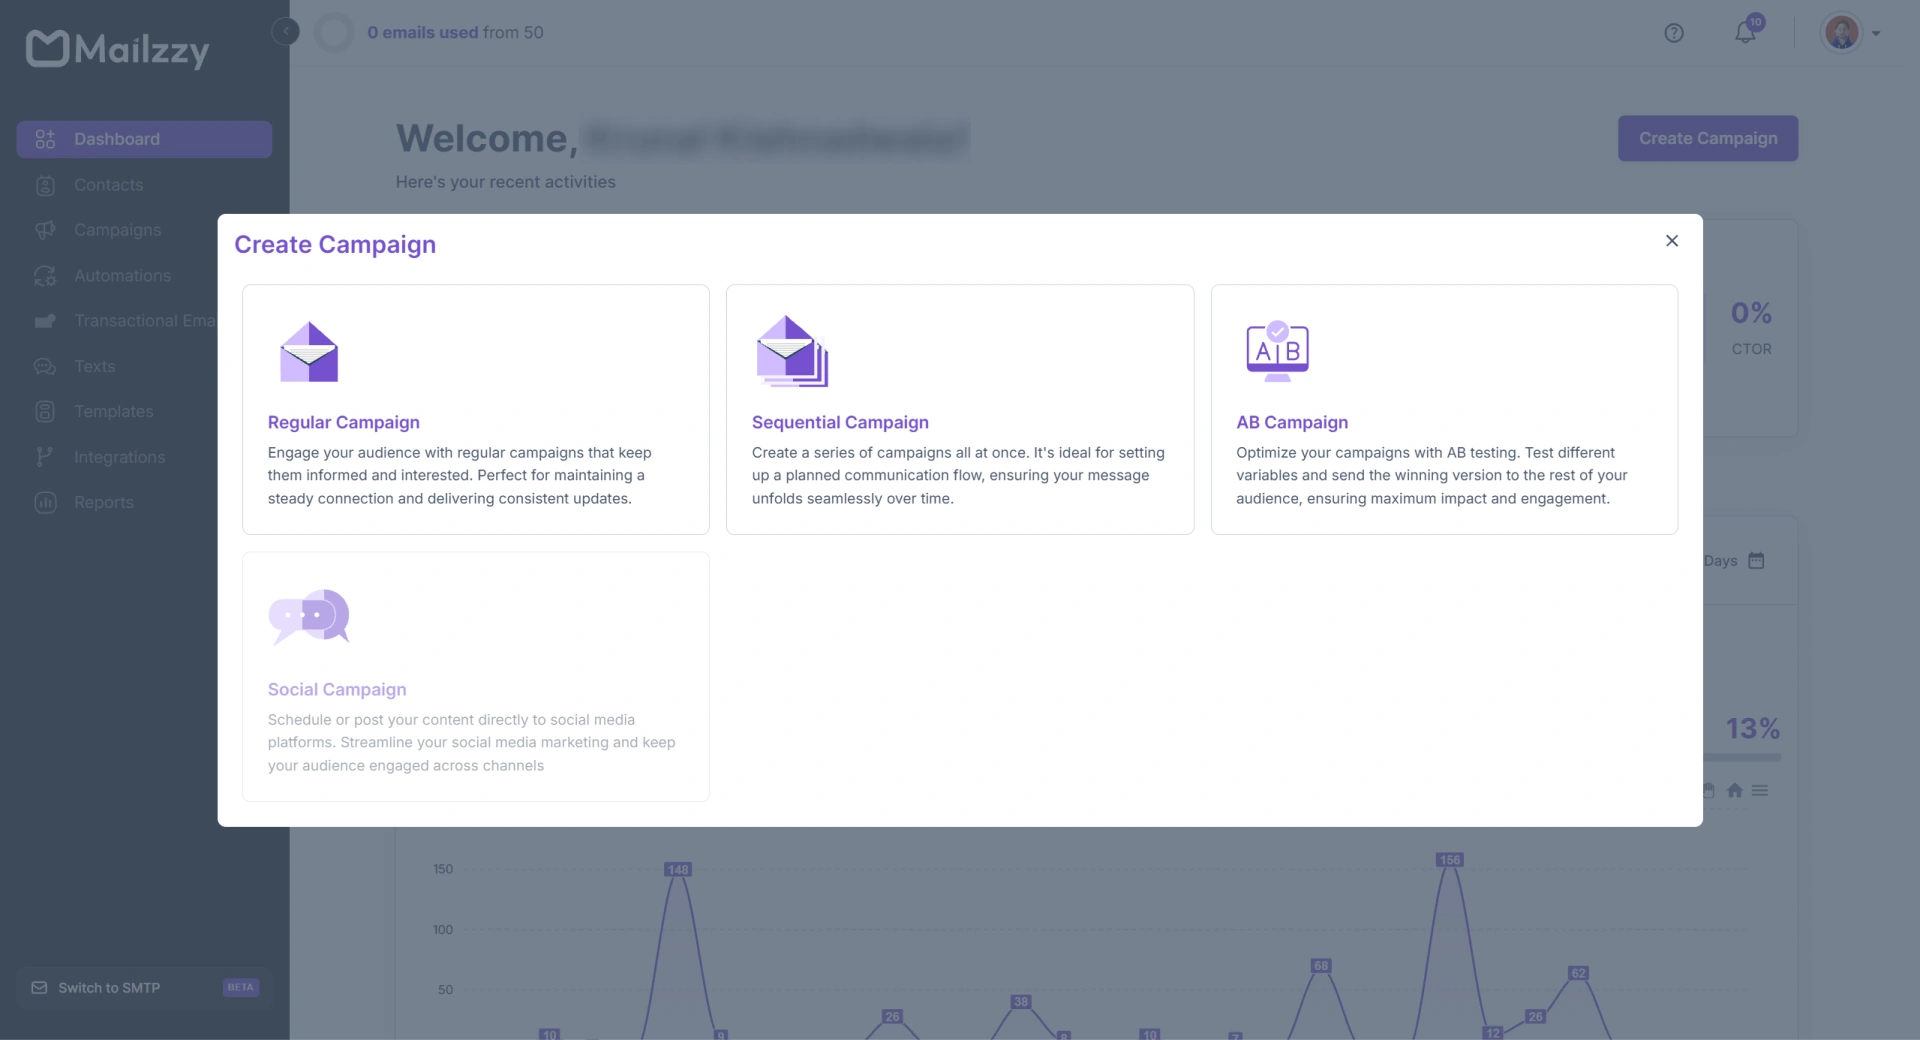
- Enter an internal campaign name — this is for your reference only and will not be shown to recipients.
- Click Create Campaign to proceed.
Step 2: Configure Your From Details
Select the sender identity your recipients will see:
- From Name — Your business name or personal name as it should appear in the inbox.
- From Email — Your verified sending address. Only verified senders appear in this dropdown.
Note: If your sender email has not been verified, navigate to your profile menu > Senders, Domains & Dedicated IPs > Senders and complete the verification before returning to this step.

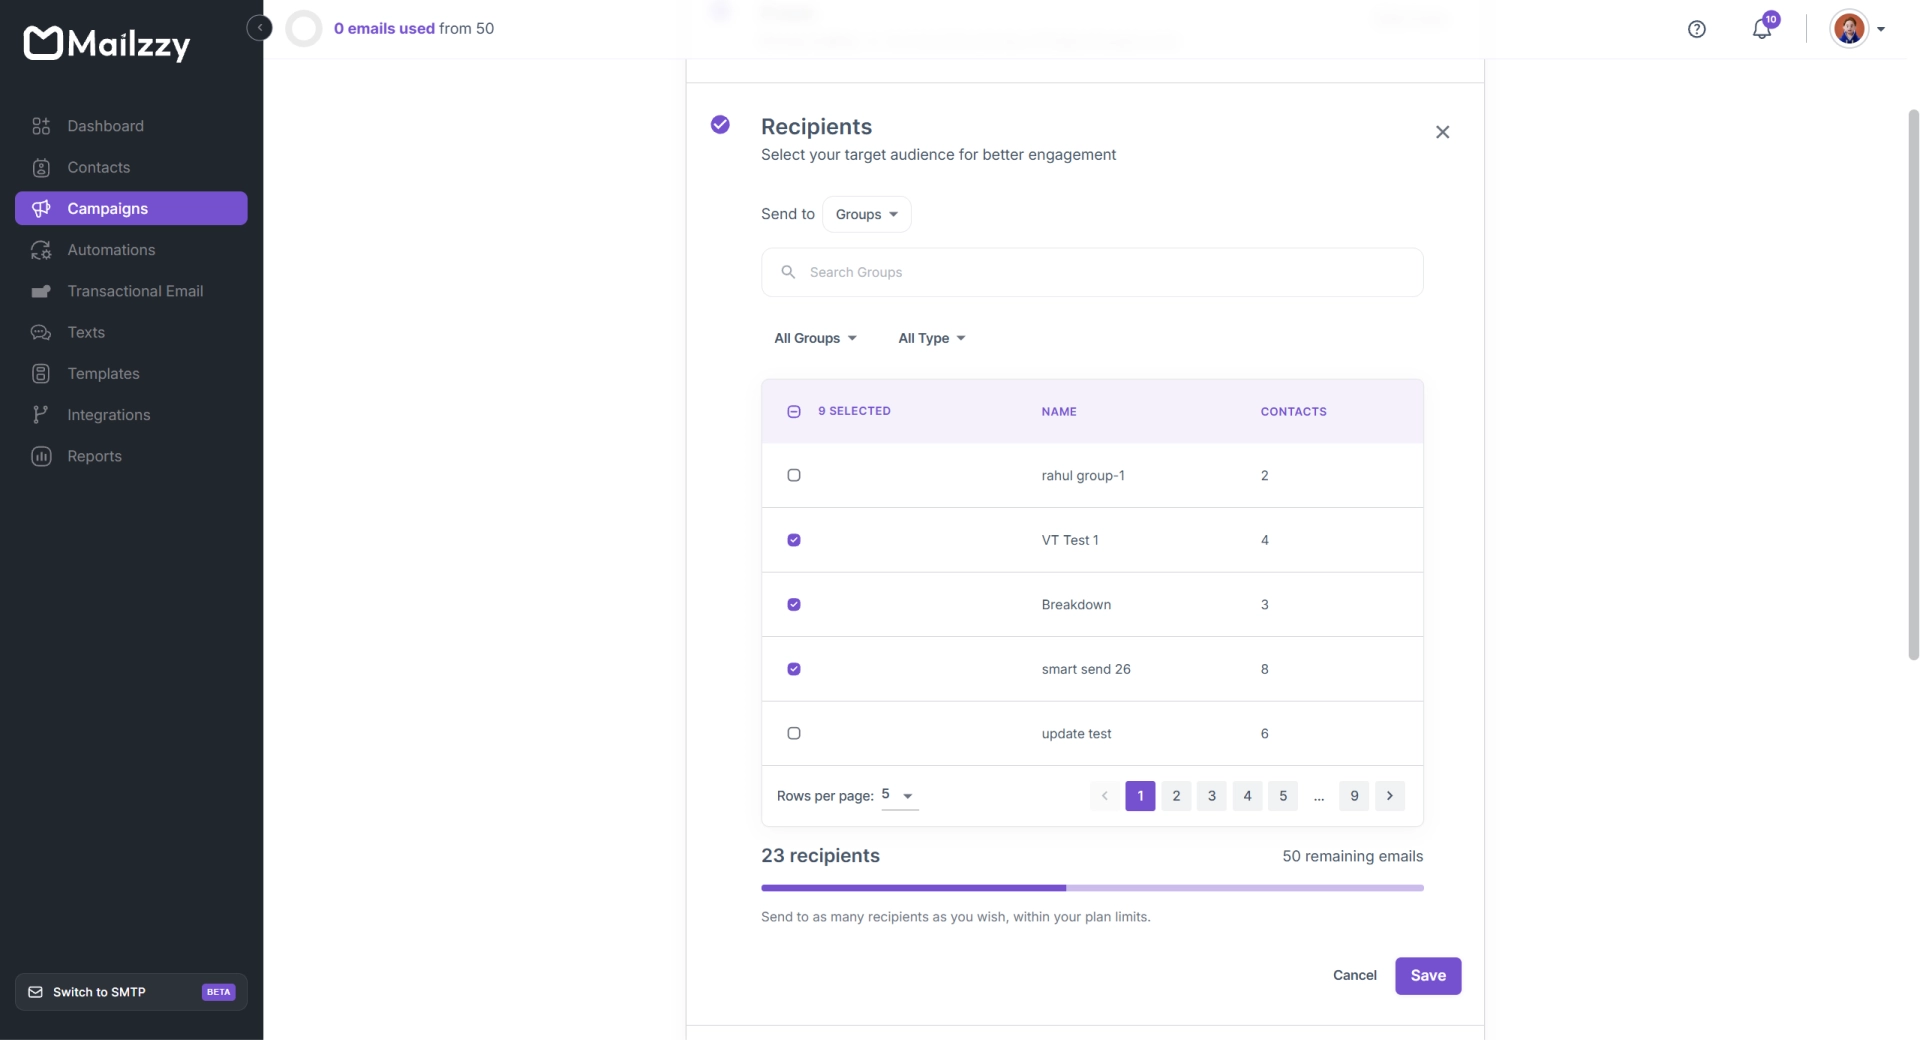
Step 3: Select Your Recipients
Choose who will receive the campaign — a contact list, one or more groups, or a saved segment.
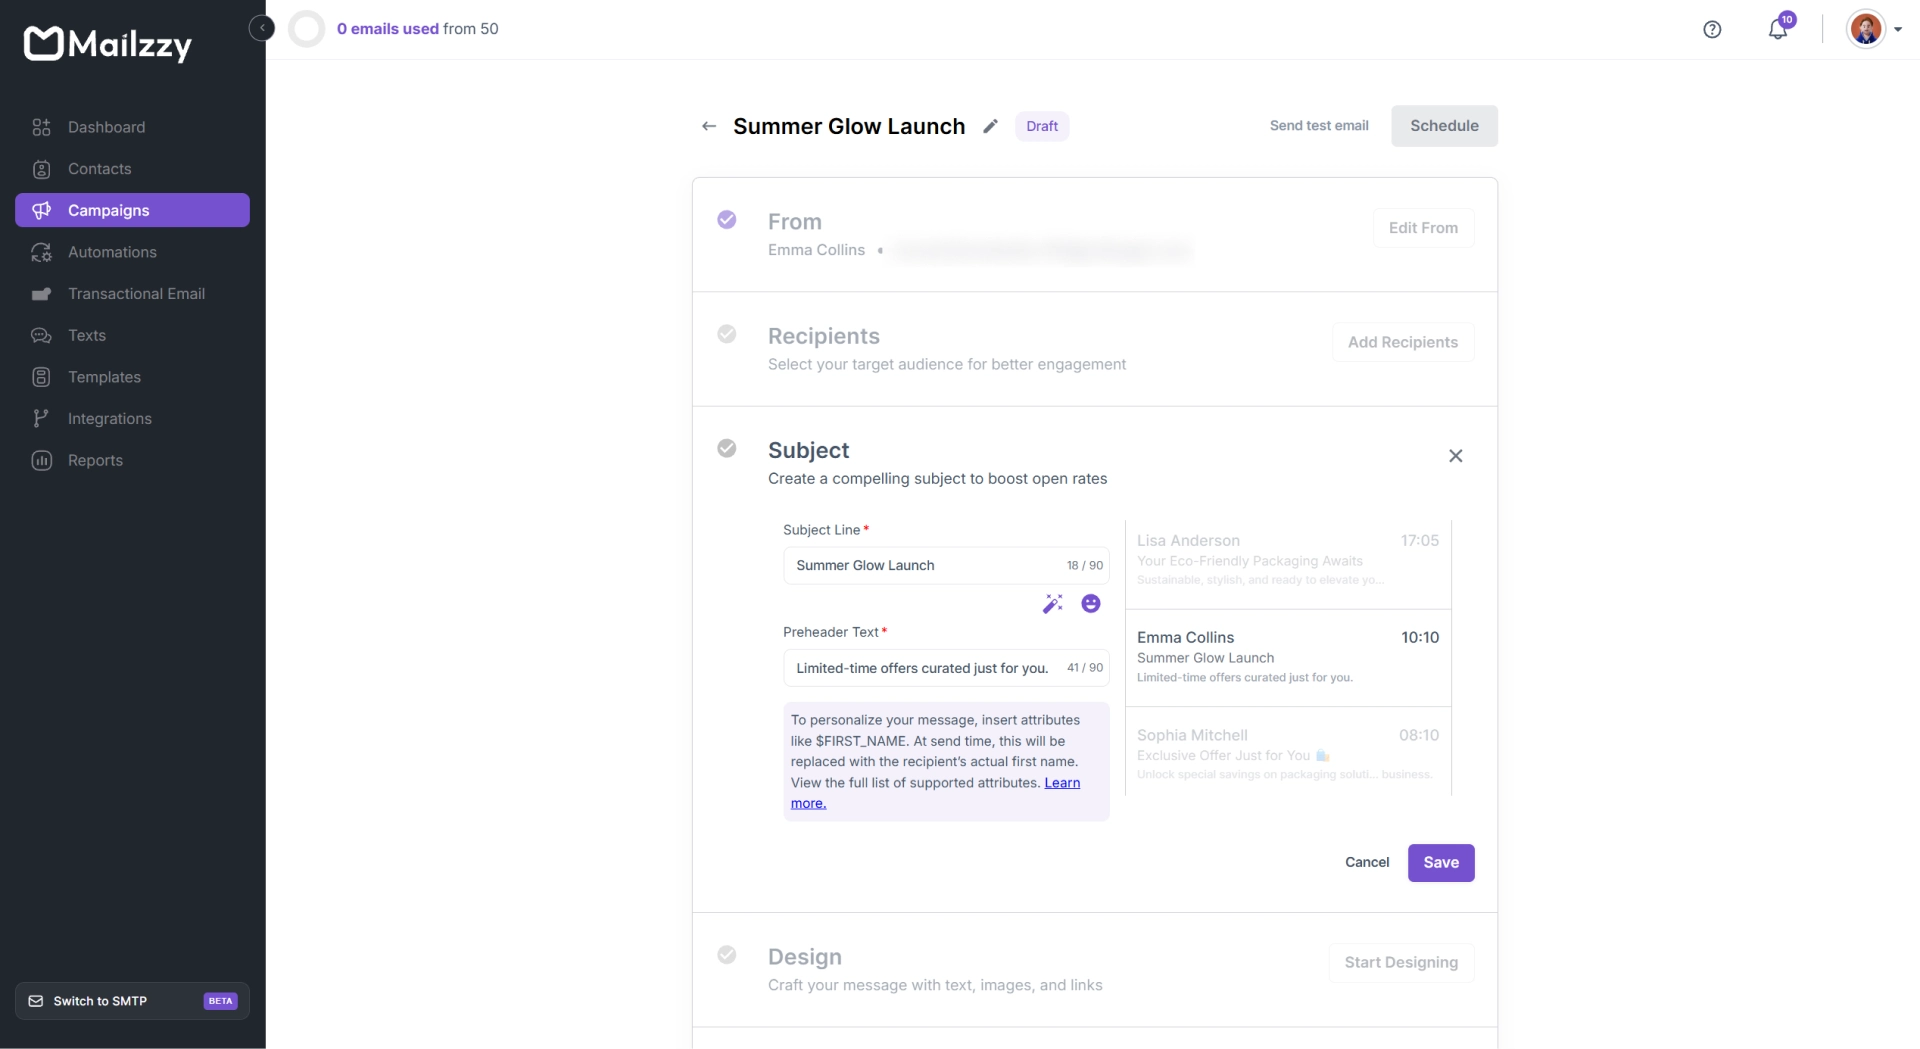
Step 4: Write Your Subject Line and Preview Text
- Subject line — Be clear, specific, and truthful. Avoid anything that could be flagged as misleading or spammy.
- Preview text — The short snippet that appears next to the subject in the inbox. Use it to add a secondary hook or supporting detail.
Note: Use the AI Subject Line Helper to generate subject line options based on your email content.
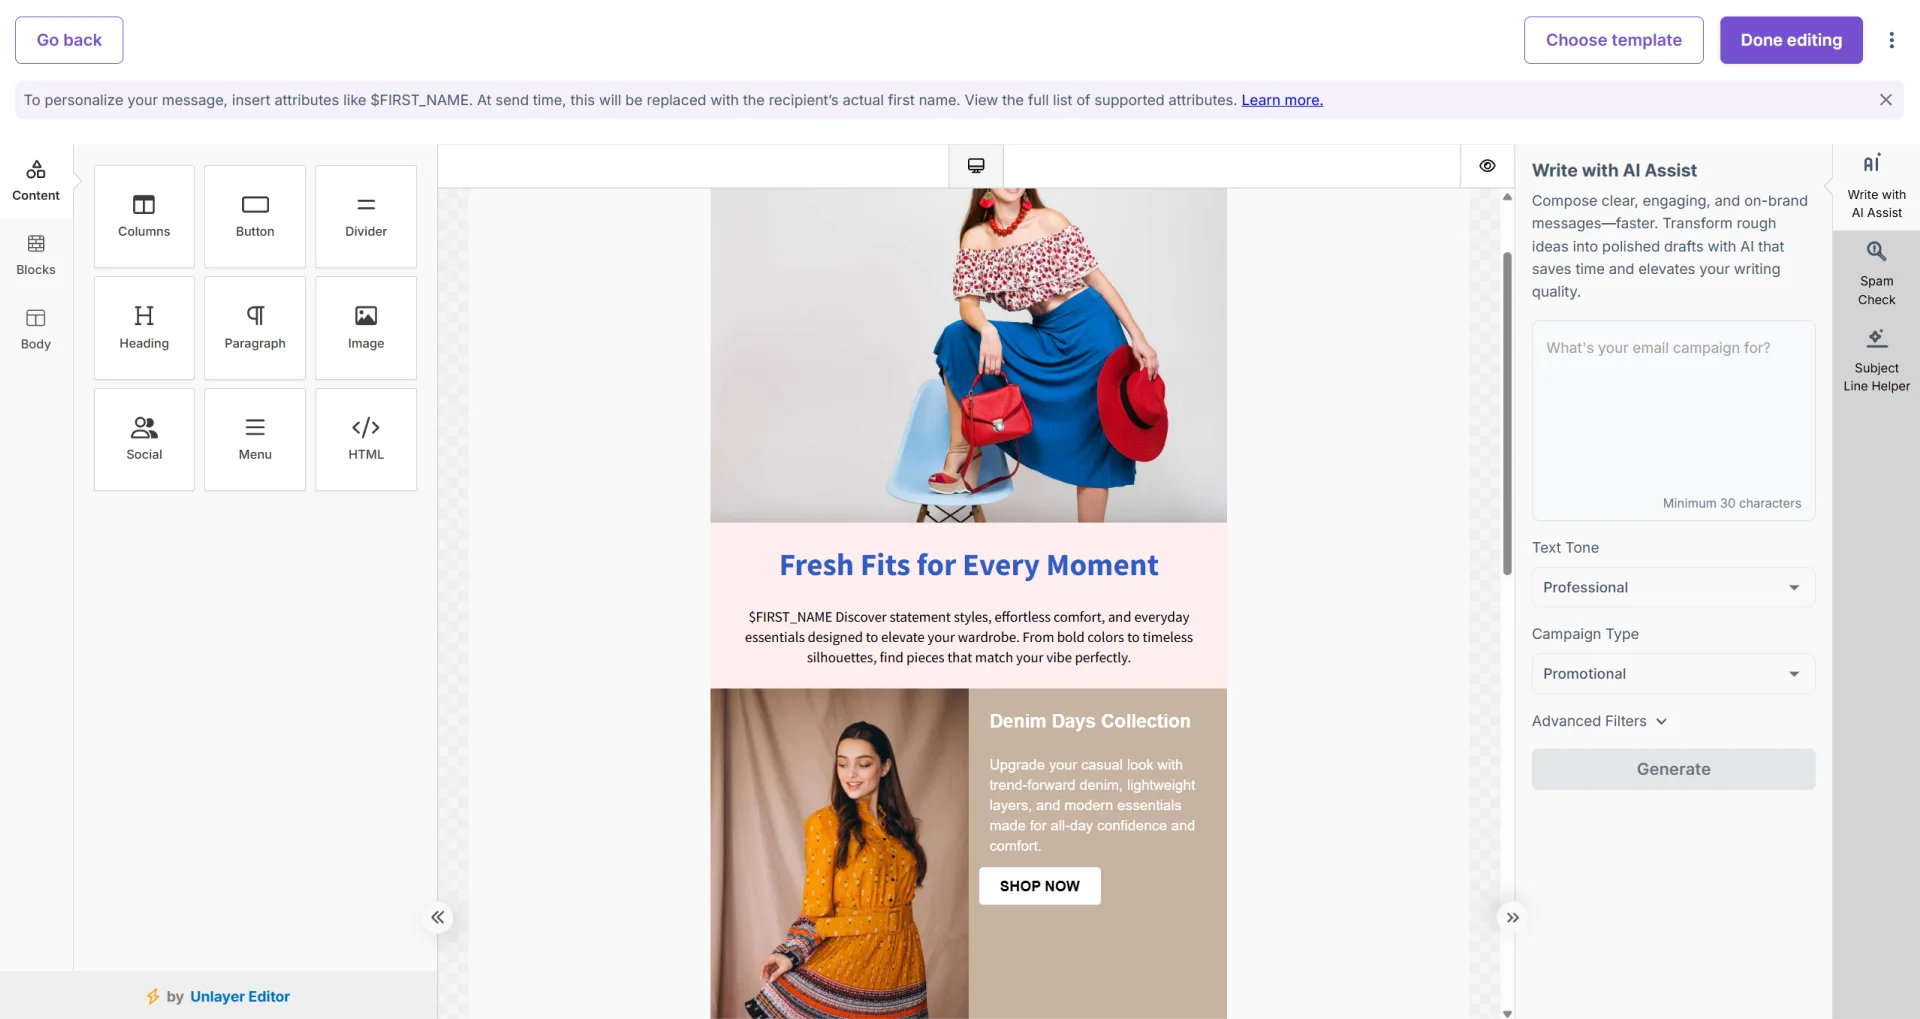
Step 5: Design Your Email
- Click Start Design to enter the email editor.
- Select a pre-designed template or begin with a blank layout.
- Use the drag-and-drop editor to build your email — add text, images, buttons, and other content blocks.
- Preview the design on both desktop and mobile before finalizing.
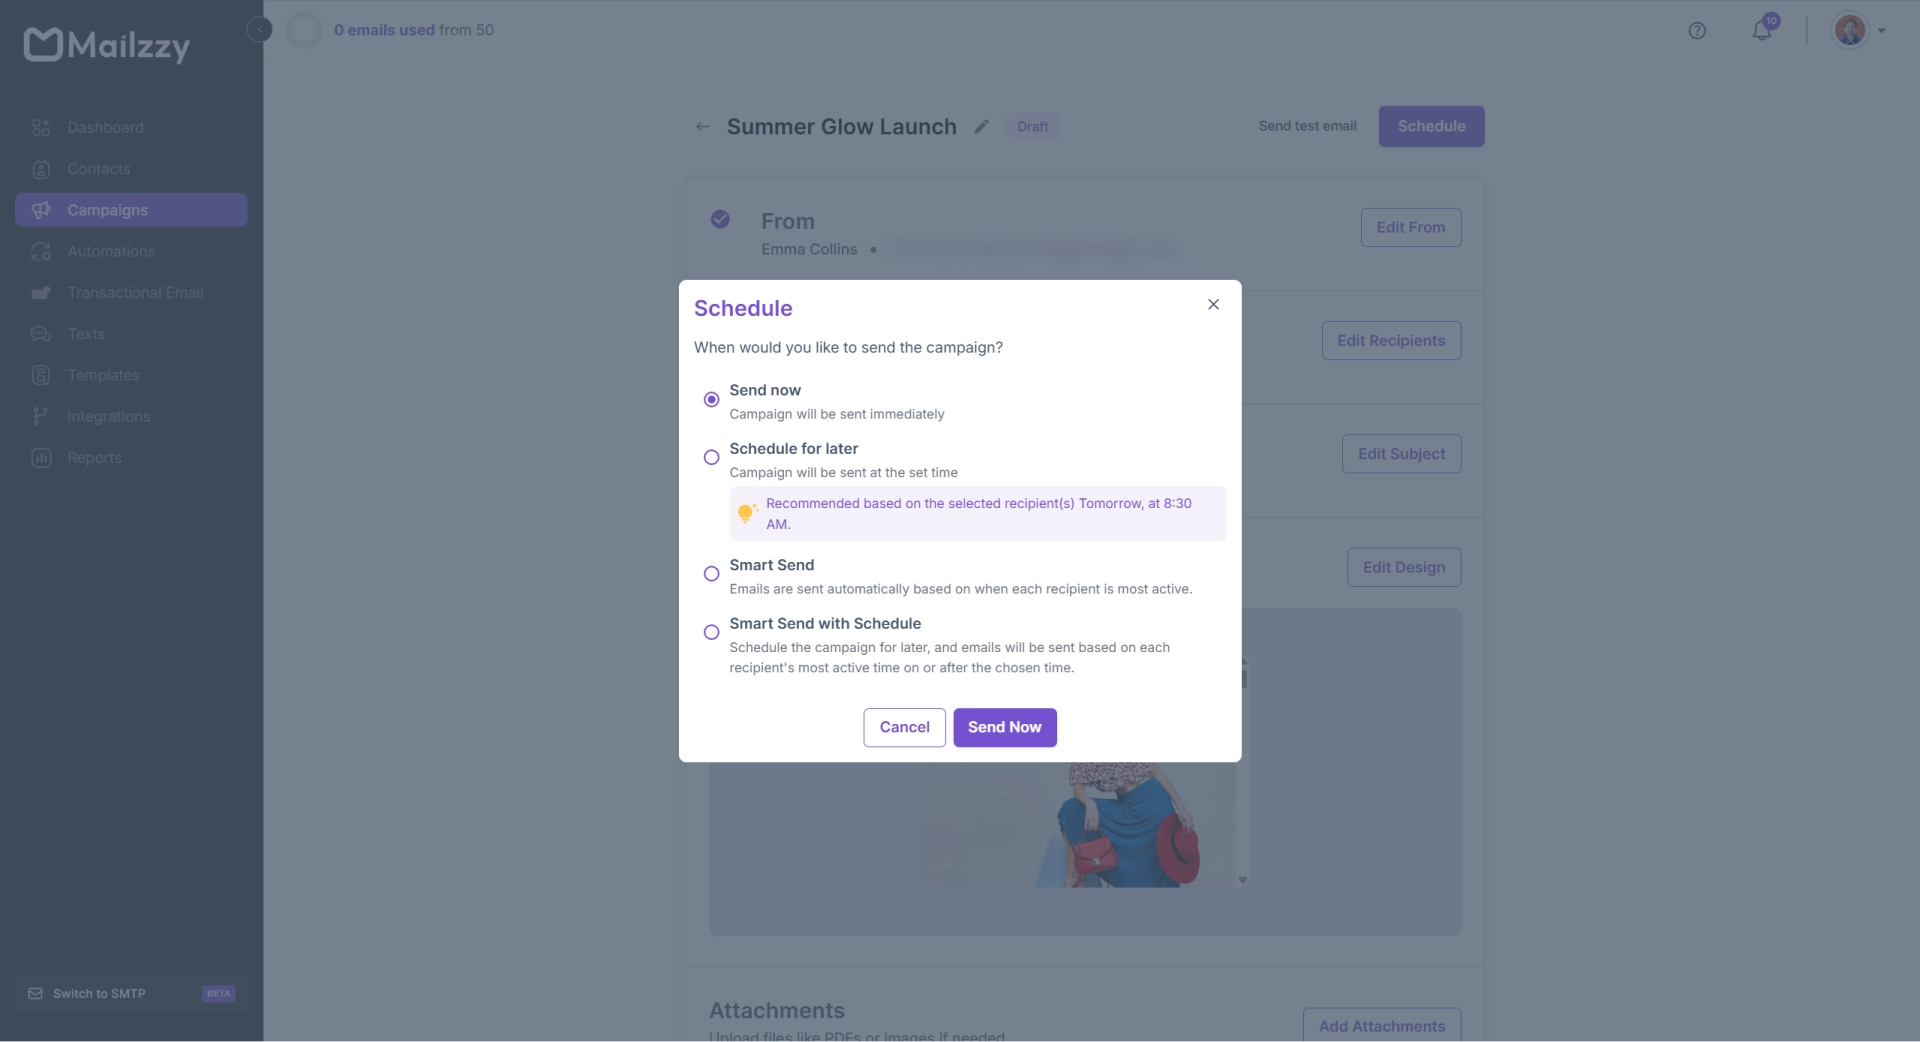
Step 6: Send or Schedule
After reviewing your campaign summary, choose one of the following sending options:
- Send Now — Dispatches the campaign immediately.
- Schedule for Later — Set a specific date and time for delivery.
- Smart Sending — Lets Mailzzy determine the best send time for each recipient based on past engagement.

Designed to meet WCAG 2.1 AA
Let's keep in touch
Sign up for our weekly email marketing newsletter and Mailzzy updates.
For more details, review our Privacy Policy


© 2026 Mailzzy. All rights reserved.

